Teaching With Style: Linky party

Showing posts with label Linky party. Show all posts
I'm teaming up with my blogging friends Tonya, Angelia, and Courtney to give you a recipe link-up of Pinterest tried and true recipes so you don't have to pin and wonder if it's actually good!


Cilantro Garlic Lime Chicken with Zucchini Noodles
This one is soooo good and easy.  Zoodles are all the rage right now, but you can only make them with spaghetti sauce so many times, am I right? 

Via Mrs Happy Homemaker

The Original Recipe:
This recipe only utilizes a few ingredients: zucchini, chicken, jalapeños, taco seasoning (I use the 21 Day Fix mix), garlic salt, limes, cilantro, and cooking oil. Crystal (the original poster of this recipe) uses the little handheld Veggetti spiralizer, but I like a bigger one by Paderno.

Changes I made to the Recipe:
  • Omitted the jalapenos (my kids hate them)
  • Used a different spiralizer
  • Used garlic powder instead of garlic salt (I watch my sodium intake)
  • Used leftover shredded chicken already seasoned with taco seasoning from taco night earlier this week - score!!


Healthy Banana Pancakes
Banana pancakes always make me think of my fav singer Jack Johnson.  But I had some soft bananas on my counter this morning, so why not? I love trying out new healthy recipes, especially ones that my kids will eat, so I was excited about this one.

Via Liz Heather

The Original Recipe:
This recipe has only 6 ingredients, and they were all things I had on hand: 2 eggs, 1 banana (I used a soft one), oatmeal, apple sauce (I used a snack cup one), vanilla, and cinnamon.  All you do is throw all the ingredients in a blender until smooth, then pour onto a heated surface (I used a skillet) to make pancakes.  
Ingredients (minus the applesauce - I forgot to grab that for the pic!)

Blending it all up
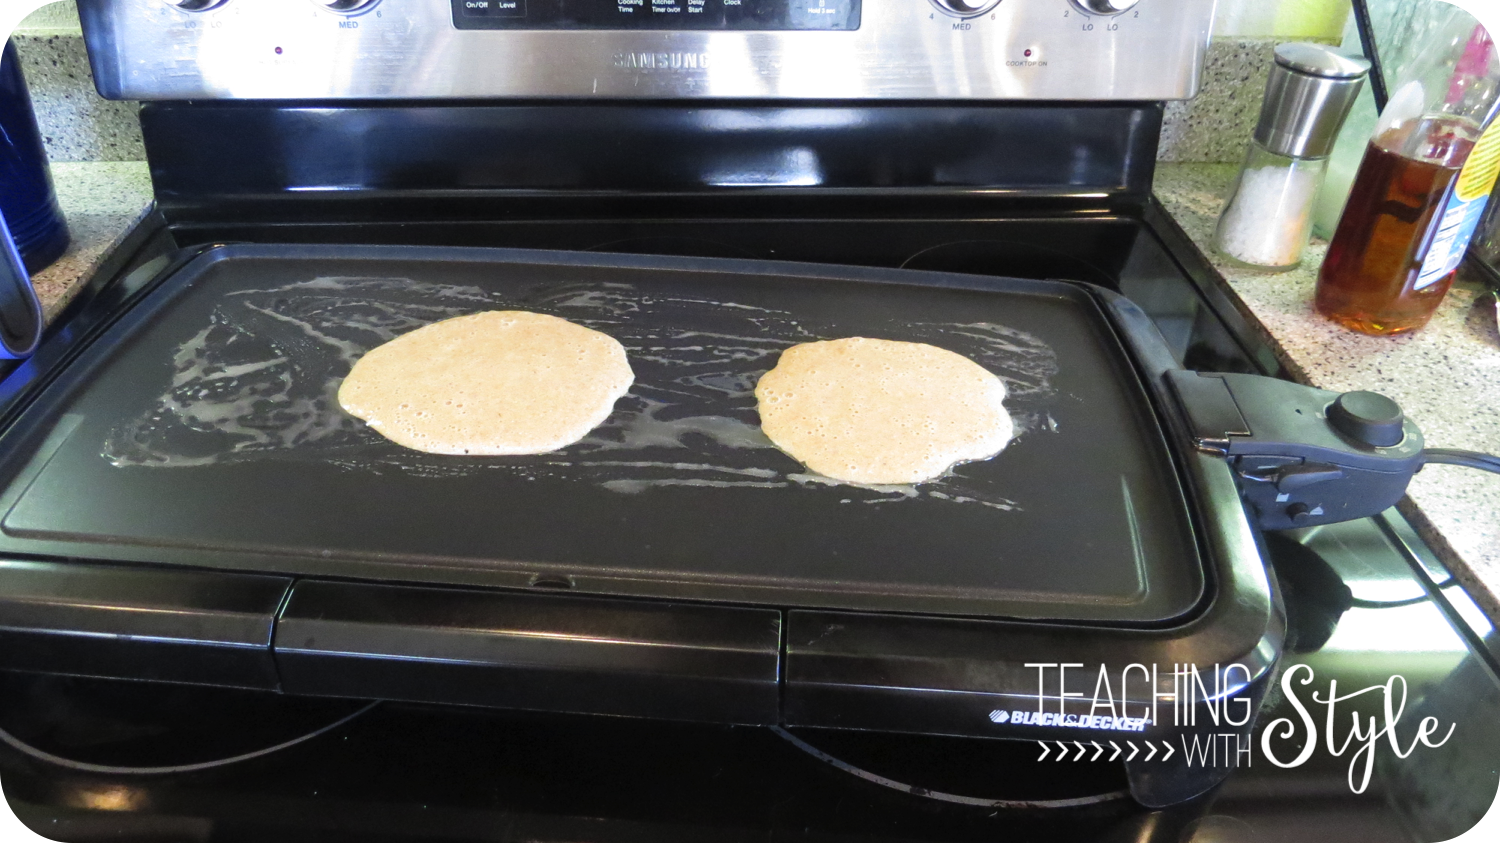
On the skillet

Ready for the kids to eat!


Changes I made to the Recipe:
  • My Vitamix blended all the ingredients so beautifully, but maybe too smooth because the batter seemed kinda runny.
  • After playing with the heat settings on my skillet, I realized that 300 degrees was perfect to cook the pancakes. 
  • I put extra butter on the pancakes with lilikoi (passionfruit) syrup for the kids.  They loved.  I ate mine plain and they were still good! 
  • I will definitely be making this again.  I think even smaller rounds would be good, then they could be a snack! 


I am so excited to be bringing you a BRAND NEW monthly link up with some of my favorite gals! 

Introducing the: 


I'm teaming up with Angelia, Tonya, and Courtney  - they are a HUGE part of my teacher/blogger tribe.  I turn to them with questions about assessment, help figuring out a standard, ideas for fun lessons, and even personal advice! 

Another thing I turn to them for is ideas for easy, and healthy recipes! We all love Pinterest, but who has time to try out all those cool recipes just to have it not turn out the way it shows in the picture and imagine yourself on the Pinterest Fail page?? Not me.  I lean on my girls to share which ones ACTUALLY turned out good - and now we are sharing with you!

On the 3rd Sunday of every month, we will be hosting our Pinterest-Approved Recipe Link-up!! 
We will share our favorite, *successful* Pinterest recipes that we've done in the past or throughout the month and we hope that you will share yours too!! 

So get ready, tomorrow's the big day!


Welcome to November's Bright Ideas! This month we are rounding up all our best posts into one!


I'm sharing some fun ideas for Guided Reading and small groups!

First up, I love to open my groups with some warm-ups.  Sometimes I use slinkies to practice stretching out the sounds in a word for phonemic awareness.

 Sometimes I do some dictation and have the kids practice writing and then blending CVC words on whiteboard dots that are stuck right on my guided reading table.

Then you'll want to see how I level books and organize my take-home books.

And lastly, kids will need to reference the word wall.  See how I set mine up to be interactive!

Do you use any of these ideas in your classroom? Make sure to check out all the other amazing ideas in the Round Up below!

Today I'm sharing with you how I arrange, organize, and implement my take-home library! My students fill out a reading log each night and I send home books at their reading level for them to read.  I did this for 4 of the years I taught in Oregon (in kinder, 1st, and 3rd), didn't do it when I taught 2nd grade on Lanai, and am implementing again in 1st grade on Maui.  I didn't do it on Lanai because I didn't have enough extra books for it.  And you know what? I noticed a huge drop in my students who filled out their reading log and read at home.  When I send books home each night for my students to read, they don't have the excuse that they "don't have anything to read" at home! 

First up, collecting books!

When I taught in Oregon, I was lucky enough to have an educational foundation in my school district that gave out grants to teachers.  I won a grant for a take home library my second year there.  I bought collections of books from Scholastic that were appropriate for grades K-2. At the time, I taught kindergarten and found that I needed to supplement for the lowest levels.  Luckily, I had worked with a Title I teacher a few years prior who had boxes upon boxes of books and she gave some to me! Many of them were old leveled readers, but that meant that there were the lowest levels available.  

Here is a basket of old leveled readers at my new school that I'm going to use for take-home books.

Next up, leveling them! 

Every school I've worked in (until now) used the Developmental Reading Assessment, so I leveled my books with DRA levels 1-38.  In DRA, 1-3 is kindergarten, 4-16 is 1st grade, 18-28 is 2nd grade, and 30-38 is 3rd grade.  The levels are kinda funky.  There is 1, 2, and 3.  Then 4, 6/8, 10, 12, 14, and 16.  Then 18, 20, 24, and 28.  Then 30, 34, and 38.  I like the DRA assessment because it gives a lot of good information on who each student is as a reader and also gives suggestions for what to practice to help them move forward.  By using this assessment, you can group students by level or even by strategy that they need to work on.  It does take awhile because you have to read with each student, but I appreciate it because I get to know my students so much more.  

But my new school doesn't use DRA.  We do STAR testing 3 times a year.  It's an online reading test.  That means I don't read with my students until they are in groups.  I'm nervous, but I've heard it's pretty accurate.  The STAR test gives students a grade level rating, which is different than the DRA.  My students rated at a 0.5 (middle of kindergarten) to 1.7 (7th month of first grade).  So now I need to re-level my books to reflect the grade level rating.

There are many other leveling systems you can use and conversion charts are an easy google search away.  You can level your books by Fountas & Pinnell's Guided Reading Level, Reading A-Z, Lexile, or even Reading Recovery (if your school is so privileged to still have that awesome program).  I recommend deciding on one leveling system and sticking with it. 

To find all the levels, I first started with Scholastic's Book Wizard.  Then I would google search the title in parenthesis, the author in parenthesis, and the words "reading level" in parenthesis.  I would most likely find a website that has the information.  


On my older books that are labeled with DRA levels, I had made address label stickers with the level number on them.  I cut the labels in half before putting the sticker on the top right corner of the book cover.

The old leveled reader books in my new classroom already have circle stickers on them.  I think just writing the level on the sticker with a Sharpie would be a great option.  

Since my new school uses the STAR test, I'm going to change all the levels on my books to the grade level equivalent.  I'll probably use address labels and have to peel the old labels off my books. 
So after all my books are labeled and I know my student levels, they can start taking them home.  I keep my books in these Sterilite drawers.  I have 4 sets of them and label each drawer with one level.  Kids pick a book from their level and put it in their homework binder.  If they don't bring it back the next day, they don't get to bring a new book.  So the rule is: if they forget the book at home, they'll have to read it more than once.  Which is not a terrible idea. Students become better readers by reading text that is familiar.

I don't use a check-out system or keep track of who has which book.  If they bring it back the next day, they can get a new one.  If they don't, they'll have to read the book at home twice.  I'm sure I lose a few books each year doing this, but I feel that not having to deal with the hassle of keeping track outweighs that risk! 

Make sure to check out all the other Bright ideas link up!  You can follow me on Facebook, Instagram, and Pinterest


I'm here with a Bright Idea for July!


I've moved into my new classroom and have started moving things around.  I'm so lucky, since the teacher who was in my room last year left a lot of decor items up for me.  One including the word wall.  She left little tacks underneath the letters on these cupboards and I'm not sure what they are for.


So I decided to make my own interactive word wall! First, I typed up the sight words from our new basal series that we have to teach, Wonders.  I printed them, cut them out, and laminated them.


Then, I stapled black ribbon underneath each letter card on the word wall. 


Next, I needed to gather materials to make the words interactive.  I decided to use glue dots (on sale at OfficeMax!) and clothes pins.


I put two glue dots on the pin.


Then pressed the card onto the pin.


And pinned it onto the ribbon.  Now the kids can come up to the word wall and clip on and off words that they need to use during writing! 


I am so excited to use this system in my classroom this year! 

If you liked my bright idea, please make sure to follow me!


Don't forget to check out all the other Bright Ideas in the linky below! 


I checked my most wishlisted item on TpT and it's my What To Do When You Are Finished posters - so I put them on sale for you! I made these when I was sick of my kids asking what they can do when they are done with their work.  I've updated them since I originally made them and now have them as a small poster and also a large poster.


It's so easy to just move around the cards for what kids can do when they are finished.  This way I don't need to prepare extra activities and I can teach kids to use the materials already in our classroom when they are finished with their work.  I included a lot of card options for you!

Don't forget to check the Owl Blog to see the other sales for Wish List Wednesday!

I'm joining the Bright Ideas link-up again!

This month, I'm bringing you a Bright Idea about packing your classroom.  Some of you may know, that I have accepted a 1st grade position at a school in Maui.  So our family will be ordering containers, packing our house and packing my classroom at the end of this month. I'm here with a Bright Idea for May!


I'm a teacher-a-holic and own way too much of my classroom materials than I should.

To help pack, store, and transport my posters, I use one of those tri-fold bulletin boards.  I taped it together and it is the best!


I keep my posters in these narrow drawers throughout the year so I have easy access.

But then as I'm ready to move - I taped together a science fair display board and turned it into a poster holder.  I've had this for 8 years and it's still going strong.  Its easy and thin enough to store behind some stuff in my closet.

Do you need poster storage? Or are you moving schools like me and don't want your posters ruined?

For more bright ideas more than 130 different bloggers, please browse through the link-up below and choose a topic/grade level that interests you. Thanks for visiting!


I'm linking up with my friend Jennifer, over at Rowdy in First Grade for some Teacher Confessions....

  1. The same thing happened last year - I plowed through our reading curriculum and now we get to actually have some fun, literature-based lessons.  Right now we're doing an ecology/rainforest unit and studying the Great Kapok Tree.  We are loving it! 
  2. Since I'm good to go on our standards and have things copied and prepped for the rest of the year, I haven't written anything in my plan book.  Ooops.  In my defense, I did go through my weekly newsletters to double check what I had told parents we were learning and wrote that down in my book for last month.  So I don't look like a complete slacker.  
  3. I asked my ESL aide to count Box Tops today.  No, he didn't work with children.  He counted Box Tops.  Priorities, people ;)
  4. I have 4 weeks until the end of the year, but I have already started packing for my move to Maui.  I have to pack an entire classroom and a house, people! At my old school, we were required to wait to pack until the last week.  Not here.  It's packing time.  Maybe I'll have the kids help :)
  5. I stopped spelling because I don't actually think memorizing words and giving tests actually helps kids learn to spell.  And I hate grading those tests.  Instead, we are learning root words this quarter.  The kids are loving the change, so I think it's a win.
  6. I also despise timed math tests.  After going to a Singapore Math workshop a few months ago, I was validated in that.  I ordered the Math Sprints book on Amazon and it took foreeeeeeevvvveeer to get here.  But, it's here, and the kids love it.  They love beating their own scores! And I don't grade anything, or write it down.  I love it. 
  7. We just finished reading Charlotte's Web and we did comprehension questions after every chapter and also a culminating project.  These past few days, we watched the movie - just because I wanted a break.  That's ok, right?  One of my sweeties wrote me a card for Teacher Appreciation that said "I love that you let us watch movies."  This is not a regular occurrence! SMH. 
  8. I'm loving my economy system this quarter and fining kids for not listening, not doing what they are supposed to be, talking in line, and many other things! They are finally motivated! 
  9. My observation is on Friday.  My first one of the year.  In the last month of school.  I'm not excited. 
  10. Even though I know moving is going to be better for my family and for my career, I will honestly miss the community and my students on Lanai.  I am hoping to keep a good relationship with my friends here and visit often! I'll only be on the next island over. 
What are your confessions? Surely you are a little like me? No? Humor me, please! 


Welcome!  This month's Bright Idea is so super simple - how do I hang things in my classroom?

The first trick I learned from my pal Corinna at Surfin Through Second - Magnets!  This is the first classroom I've had where the whiteboard is magnetic.  Corinna suggested getting little, thin magnets and taping them to the back corners of whatever you want to permanently hang on your whiteboard. 


This option is perfect for me because we have louver windows that when open allow the wind to come rushing through the room, blowing papers off desks and walls.  My posters with these strong little magnets stuck to the back don't go anywhere!  You can find these kind of magnets at Home Depot or craft stores.

Now what about things that go on walls, cabinets, or other non-magnetic surfaces?  Painter's tape!  This isn't a new idea by any means, but the way I organize it might be a new idea for you - Tape Pillows on a whiteboard! 


Before I start taping things to the walls, windows, cabinets, or doors, I make a bunch of little tape pillows and put them on a student whiteboard.  This makes the arranging so easy.  It's really quick for doing activities with the kids, too.  Sometimes we make labels for an anchor chart or we add words to our word wall.  It's so nice to have these little tape pillows ready to go so we don't waste any time.

Thanks so much for stopping by today! If you enjoyed this Bright Idea, 
please join me on Instagram, FB, or TpT! :) 

Make sure to browse through the link up to find 150 other 
amazing Bright Ideas from my favorite bloggers!