Teaching With Style: Featured

Showing posts with label Featured. Show all posts

I know I'm about 3 years late to this party - but I've had the book Worksheets Don't Grow Dendrites on my shelf since 2015 and I knew I needed to read it! Since I've been working in an Arts-Integrated school, my teaching has really transformed.  I don't do nearly the same amount of crafts as I used to, students create their own graphic organizers and Thinking Maps in composition books, and my reading instruction doesn't include the same amount of comprehension worksheets as it used to.  With today's education focusing on brain research and appropriate development, it seemed like a good time to crack this book open and dive on in. 

Marcia Tate (as seen in this YouTube Video) starts the book off with two scenarios:

  1. Mrs. Taylor, a civics teacher, who gives lectures day in and day out.  Sometimes her lectures go on for the whole class! She doesn't use visuals and expects students to take notes on what she says. She has them round-robin read (which we know is a huge no-no for a whole group setting).  Not surprising - few of them are listening or engaged.  
  2. Mr. Stewart is a civics teacher next door, but he has different techniques for his classroom.  He uses graphic organizers, checks for understanding with questioning techniques, and even gets students involved in a simulation activity to learn the branches of the government.  He has few behavior problems and his students excitedly learn the content.  
As 21st Century teachers, we know that they ways we were taught in school just don't work anymore.  They weren't engaging then and they aren't engaging now.  We want ALL of our students to succeed, not just the ones who are intrinsically motivated.  Tate has come up with 20 strategies to ensure that students are learning and having fun at the same time:
  1. brainstorming and discussion
  2. drawing and artwork (Yay for arts-integration!)
  3. field trips
  4. games
  5. graphic organizers, maps, and webs
  6. humor
  7. manipulatives, experiments, labs, and models
  8. metaphors, analogies, and similies
  9. mnemonic devices
  10. movement (more arts-integration!)
  11. music, rhythm, rhyme, and rap (even more arts-integration!)
  12. project-based and problem-based learning
  13. reciprocal teaching and cooperative learning
  14. role plays, drama, pantomimes, and charades (arts-integration again!)
  15. storytelling
  16. technology
  17. visualization and guided imagery (ahem, arts-integration)
  18. visuals
  19. work-study and apprenticeships
  20. writing
As you can see, there are quite a lot of connections between Tate's 20 strategies and arts-integration.  There are also a lot of connections with visual learning, which is helpful for struggling learners and multi-language learners.  We know that long gone is the Sage on the Stage, that we need to be the Guide on the Side.  If you are interested in expanding your repertoire or even validating some practices you already do, I suggest checking out this book. I was not compensated for providing this review, I just love reading teacher books and sharing them with you. 


Which strategy are you excited to learn more about or try? Which is one that you already do?


I recently had a DonorsChoose.org project funded that I'm really excited about - Legos to teach place value! I got the idea from my friend Jen who blogged about it over on Hawaii's HSTA HYPE blog.  Basically, instead of using base ten blocks for place value, you use Legos.  Here's why Legos are better:
  • Many students have Legos at home and can use them while doing homework
  • Students have background knowledge of Legos and already love using them
  • Legos create a novelty and bring some fun into your math class

I was intrigued by the idea, so I wrote up a project.  Here is what I requested:

  • Akro-Mils 24 Drawer Hardware and Craft Cabinet
  • 2 sets of Drawer Separators 
  • 2 sets of Multi-colored 10"x10" Base Plates
  • Brick Separators
  • 1000 1x1 Lego-Compatible Bricks

Did you know that The Lego Store is now an approved vendor for DonorsChoose? So excited about that! Unfortunately, I had to write a special request because it was a few months ago.  

I went into the Pick-a-Brick section of their website and ordered 240 white 2x10 plates (part # 383201) and 200 gray 1x10 bricks (part # 4211521).  Using five 2x10 plates lined up on top and 3 spread out on the bottom to secure together, I was able to create 10x10 pieces to use as the hundreds pieces.  I got this great idea from Jen, too. 


In our math curriculum, we are currently working on standard 1.NBT.C.4: Add within 100, including adding a two-digit number and a one-digit number, and adding a two-digit number and a multiple of 10. Understand that in adding two-digit numbers, one adds tens and tens, ones and ones; and sometimes it is necessary to compose a ten.

It's a long standard and it's a hard one for kids who are still very literal.  We've been counting the days in school using base ten blocks every day, but they still don't understand that 7 tens and 4 ones is the same as 6 tens and 14 ones.  Using Legos is absolutely helping.  Here are some photos from class as we were adding two 2-digit numbers and regrouping.


You might be wondering about storage and management. I got the drawer organizer so the kids have easy access to the materials and can grab them when they need them.  We have to practice with them whole group so they will know how to use them independently.  I have 16 sets of tens and ones, but 20 students.  So some of the students share.  We call that "making a strong choice to share" and I praise the ones who choose to share so that others can have their own.  We like making strong choices in my room and doing something that's best for everyone even if you don't want to :) 


I put the brick separators in a little container on the top.  I put the base plates 
in that green scrapbook paper container at the bottom of this pic.

I made these labels, laminated them, and stuck them on to the drawers with double sided tape.  You are welcome to grab this as a freebie! 


Let me know if you end up making a Lego cabinet by tagging me in a pic on IG and using the hashtag #learningwithlegos.  I bet your students will love it! 


In Part One of my Arts Integration series I introduced what is arts integration.  In Part Two, we will dive into Visual Text.  We will answer the following questions:
  1. What is visual literacy?
  2. How do we observe and describe visual text?
  3. How do we make sense of and connect to visual text?

What is Visual Literacy? 

When Common Core came into practice, visual literacy was a term many teachers were not familiar with.  Yet, it cropped up in many standards.  For example: 
  • CCSS.ELA-Literacy.CCRA.R.7: Integrate and evaluate content presented in diverse media and formats, including visually and quantitatively, as well as in words.
  • CCSS.ELA-LITERACY.CCRA.SL.2: Integrate and evaluate information presented in diverse media and formats, including visually, quantitatively, and orally.
Edutopia blogger and assistant editor Todd Findley defines visual literacy in simple terms: It's how we teach kids to think about and think through pictures.

How do we observe and describe visual text?

A Honolulu Museum of Art docent once told me she on average witnesses museum patrons looking at a piece of art for seconds before moving on to the next piece.  I get that - the museum is a big place.  There is a lot to see.  But what if our eyes were trained to look longer and closer at certain art that caught our fancy? I think we would notice more and appreciate more about the art.  I saw that even with art that I didn't like at first glance, once I spent some time with it and noticed more and more, it started to grow on me and I liked it more.  

The key to looking at art is to actually look at it.  Set a timer for 1 minute.  It will seem like eternity, but keep looking.  Notice the details.  When you think you've seen enough, look again.  Look closer.  Look for more.  Ask yourself "What else?" In the arts integration world, this process is called Observe.  The first step to looking at art is actually looking at it and noticing all the details.  

The next step is to Describe.  This is where you will verbally talk about what you see.  In the first PD I took about this process in 2014, we viewed the painting "Lei Sellers".  Hearing others' descriptions helped me see things differently.  The painting is a bit abstract and I did not know what was in the background.  After hearing another teacher say he saw a white boat, the painting made a lot more sense to me.  It was a cruise ship and the woman and girl were selling lei to the tourists who arrived by boat. My mother in law had told me a story about her first visit to Hawaii was by boat from California when she was a teenager.  She told me it was a rough ride across the Pacific and it took several days.  Once I knew the painting had a boat, I could start to make deeper connections and form a deeper understanding of what was going on.  

Lei Sellers by Juliette May Fraser, 1941
Oil on canvas, 26 x 18 in. 

With young children, typically we first focus on quantity, size, and color of the subjects in the painting.  This helps them know what to look for and know how to describe what they see.  In the case with the Lei Sellers, I could say "I see one large, white boat in the top left background. I see four people.  Three are facing the front and one is facing the back."  This would get us started noticing and describing.

 How do we make sense of and connect to visual text? 

The next step is to Interpret.  This is where students make inferences.  Kids are good at inferences, but we have to make sure they are grounded in evidence.  In close reading, students make claims based on text evidence.  In visual thinking, they make claims based on visual evidence.  Look at the Lei Sellers painting again.  "I think the girl is bored of waiting for the ship to come to port because she is standing with one knee popped and she is staring at her hands.  When I stand like that, I'm waiting in line at the grocery store or post office.  I'm really bored when I stand like that." Notice how I made an inference of how the subject of the painting is feeling based on what I see in the painting and also on my own experiences.  One very important phrase you will repeat over and over while interpreting paintings is "What do you see that makes you say that?"

The last step in the ODIC process is Connect.  This is the part where I would share the story that my mother in law told me about going to Hawaii in a ship when she was a teenager.  We could talk about how we can sometimes hear cruise ship horns when we are close to the harbor, or see them tendered off shore in Lahaina.  Students might talk about their parents taking a cruise in the Caribbean or Alaska, or how they have been in a boat before.  Students might make connections to selling things.  Some students might sell Girl Scout cookies or fundraising items for sports teams.  The connect section is a great way to create deeper understandings of art because we have experienced some part of it ourselves. 

Another C is Create and we do that with drama.  That is another post entirely ;)

Resources

Honolulu Museum of Art Teacher Resources - they will only send posters to teachers in Hawaii schools, but you can download them and print them out or project them for your students to view. 

Example video of ODIC - see students from my school walk through the process on our morning Keiki Honu News.

My first visit to the museum - read about my first visit to the art museum in an old post.

Reading Portraiture Guide from the Smithsonian National Portrait Gallery - they have other fabulous teacher resources, as well!

See Melanie Rick, from Focus 5 Consulting, talk about the process of reading art, from Any Given Child Sarasota - they have a great IG account, too!

Bring high quality arts integration professional development to your school! The teaching artists at Focus 5 Consulting lead my favorite workshops to attend! Talk to your administrator about bringing them to your school.  They travel all over the US!


Want to give the ODIC technique a try? Gather up some art - it doesn't need to be printed, you can show your students PowerPoint slides if printing is an issue.  Then download my updated ODIC posters to help you guide your students through the process.  I promise, your students will surprise you with their descriptions, inferences, and connections.  This will probably become your new favorite way to introduce and connect topics to art.  It's definitely my favorite!
Click image to download


What is Arts Integration?

If you follow me on Instagram, you know that I teach at an arts integrated school.  In fact, it is the only arts-integrated public school in the state of Hawaii.  We still teach required curriculum - Hawaii is a one-district state with mandated curriculum for math and ELA.  But at our school, we use the curriculum as the content to teach the standards and use arts integration as strategies for HOW we teach that content.  One main focus is on professional development.  We need to learn from teaching artists how to teach through the arts.  We need to be inspired.  Our professional development also brings the artists into our classrooms so we can see how they work with students.  And sometimes it leads to mentoring.  We all know that sitting in a one-hour professional development does not make the biggest impact on our students.  It's revisiting the content, talking about it with peers, seeing it in action, and then being coached on it after we've given it a try.  That's the model my school employs.  At each meeting, we are expected to get up out of our seats and do the work we ask our students to do everyday.  We dance, we sing, we act, we draw, we write.  If I can't get out of my comfort zone with my colleagues, how can I ask my students to do it with their peers? It's amazing how empowering it is.

Many of the teaching artists who visit my school are from the John F. Kennedy Center for the Performing Arts in Washington DC.  Here is how the Kennedy Center defines Arts Integration:
The part that really sticks out to me is that in order for integration to occur, you have to have evolving objectives in both the subject area and art form.  Reading about the Statue of Liberty and then painting her is not integration.  It's a great art enhancement.  For it to be integration, you would need to have visual arts standards that you are focusing on, as well, not just social studies.  In first grade, one of our visual arts standards is about the elements of art: line, shape, color, texture, and form.  I could focus on her color (mint green) and have students mix primary colors to create her green patina.  We could then do a science experiment with pennies to find how copper oxidizes.  The final project might very well be a drawing or painting of the statue, but after learning about color with an art perspective and her color from a science perspective, students would have a much deeper understanding and more connection to the content.

When creating a work of art (dance, drama, visual arts, poetry, etc), students naturally go through a creative process.  This process can be entered from any stage and doesn't follow the same path each time.  We all have heard it, art is messy.  But that's the beauty of it.  By not following the same exact process, we can surprise ourselves.  And that element of surprise is what is intriguing about art.


ARTSEDGE is a wonderful collection of lessons that you can try for integration purposes.  I find that ELA and social studies lend themselves to integration very easily.  Those standards are a great place to start.

Go try a lesson and let me know how it goes!


Summertime means prep-time for many teachers! If you are like me, you have tons of projects planned for the weeks you have off during the summer.  My main project: Leveling books.  My school uses Accelerated Reader (AR) and I wanted to label the books so kids could easily see the level.  

Looking around at other blogs, I was instantly drawn to my friend Jen from Teacher by the Beach's library.  She organizes hers by author's last name and nonfiction theme (like a real library!).  She also puts a sticker on the spine for the level.  Her current school doesn't use AR, so she has started to label her books with the Fountas and Pinnell system they use.  

Another library I love is Molly from Lessons with Laughter's library.  I LOVE her color coded system! Her chapter books are organized by author's last name, like a library or bookstore would do.  By color coding the spine, students know the vicinity of the book they are looking for or where to put it back.  It's just an extra scaffold. 

So when thinking about how to level and label my books, I wanted to combine the two ideas.  I created color coded spine stickers with levels in a grade-level range the same color.  My books are all organized by genre and theme, so the colors wouldn't ever be together, but if a student was interested in Captain Underpants books, she could find one easily in her level range by looking at the spine sticker.  

I printed my stickers on Avery address labels and cut them in half.  I store the labels in a grade-level range together with a paper clip. 

I looked up levels on the AR Bookfinder website and labeled each book accordingly.  

I put clear packing tape over the stickers so they last longer. 

These book are almost ready! 

To make it extra easy for the kids, I write the AR level, point total, and quiz number on the inside of each book.  When students are ready to take the quiz, the information they need is readily available. 


Want to label your books the same? I made a FREEBIE PowerPoint document that you can download from Google Drive.  Just download and print the pages you need onto Avery address labels.
Click the cover to download from Google Drive

How do you level or label your books?

I'm teaming up with my blogging friends Tonya, Angelia, and Courtney to give you a recipe link-up of Pinterest tried and true recipes so you don't have to pin and wonder if it's actually good!


Cilantro Garlic Lime Chicken with Zucchini Noodles
This one is soooo good and easy.  Zoodles are all the rage right now, but you can only make them with spaghetti sauce so many times, am I right? 

Via Mrs Happy Homemaker

The Original Recipe:
This recipe only utilizes a few ingredients: zucchini, chicken, jalapeños, taco seasoning (I use the 21 Day Fix mix), garlic salt, limes, cilantro, and cooking oil. Crystal (the original poster of this recipe) uses the little handheld Veggetti spiralizer, but I like a bigger one by Paderno.

Changes I made to the Recipe:
  • Omitted the jalapenos (my kids hate them)
  • Used a different spiralizer
  • Used garlic powder instead of garlic salt (I watch my sodium intake)
  • Used leftover shredded chicken already seasoned with taco seasoning from taco night earlier this week - score!!


Healthy Banana Pancakes
Banana pancakes always make me think of my fav singer Jack Johnson.  But I had some soft bananas on my counter this morning, so why not? I love trying out new healthy recipes, especially ones that my kids will eat, so I was excited about this one.

Via Liz Heather

The Original Recipe:
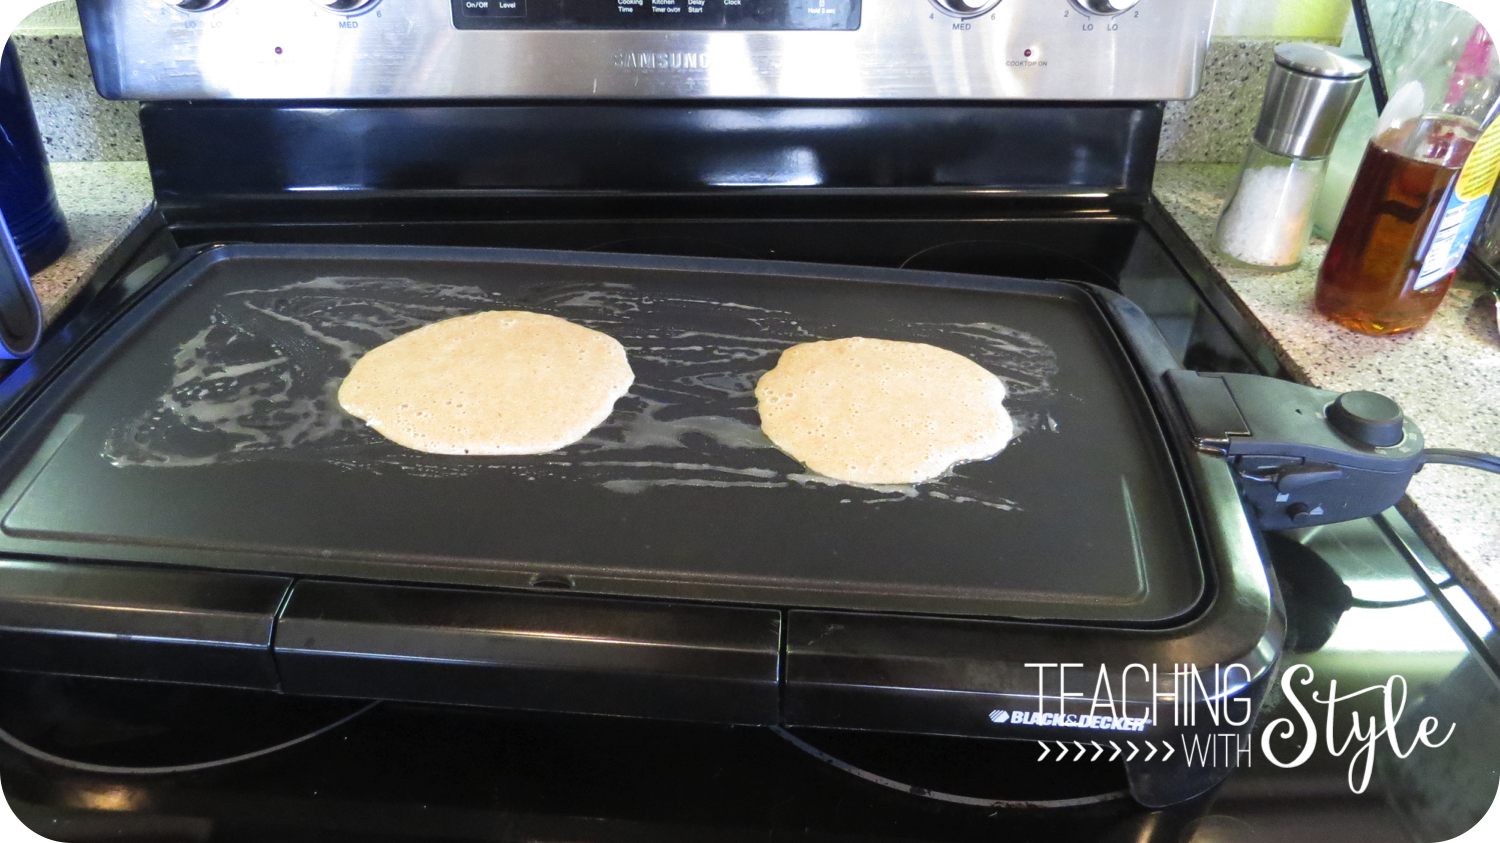
This recipe has only 6 ingredients, and they were all things I had on hand: 2 eggs, 1 banana (I used a soft one), oatmeal, apple sauce (I used a snack cup one), vanilla, and cinnamon.  All you do is throw all the ingredients in a blender until smooth, then pour onto a heated surface (I used a skillet) to make pancakes.  
Ingredients (minus the applesauce - I forgot to grab that for the pic!)

Blending it all up

On the skillet

Ready for the kids to eat!


Changes I made to the Recipe:
  • My Vitamix blended all the ingredients so beautifully, but maybe too smooth because the batter seemed kinda runny.
  • After playing with the heat settings on my skillet, I realized that 300 degrees was perfect to cook the pancakes. 
  • I put extra butter on the pancakes with lilikoi (passionfruit) syrup for the kids.  They loved.  I ate mine plain and they were still good! 
  • I will definitely be making this again.  I think even smaller rounds would be good, then they could be a snack! 


Aloha! I've officially been a 5th grade teacher for 2.5 weeks! And it's going well! Today I wanted to take some time to show you some classroom set up that is working!


When I came in my room this summer, I had enough desks for 16 students, but I knew I would have 25.  Instead of begging the custodians to find me more desks, I decided to embrace the challenge and try to go for more alternative seating this year!

I ended up getting rid of all desks except one double that was set pretty short.  I got a kitchen table for free on Craigslist, pulled a rectangle table in from the hallway, and utilized the existing round table, kidney-shaped table, and computer desks for student seating.

Now, since my students don't have desks, where do their things go?

Backpacks go on this backpack cart from Lakeshore Learning.  Thank you Donorschoose! We just wheel it out to the hallway during classtimes.

All supplies are shared and go in these drawers on the bottom shelf.  The labels are from School Girl Style's Flamingo Watercolor Set.  I used the font Sweet Peony.  The middle shelf has clipboards, crayons, mini-staplers, and date stamps.  The top is where I set down my curriculum books or read alouds, colored pencils organized by color, along with loose leaf paper, tape, extra scissors, pens, and index cards in the letter trays.  

Homework gets turned in each morning to these student mailboxes.  I also use it to pass back papers, tests, and notes from the office. Thank you again, Donorschoose! I've had this Quill Literature Organizer for 6 years and it is still going strong!  

Book boxes are really important in my room!  They house independent reading books, reading journal, writing journal, and a science poetry book.  When kids finish assignments, I don't have a fancy fast finisher area, I only allow them to read or write.  They can grab their book box, get cozy, and get to work! 
Letters on my bulletin board are from the Flamingo Watercolor collection. 

I bought this booktruck from Demco a few years ago when I was drowning in text books.  I love that it has double sided storage and moves.  This year each group has a large magazine file to house social studies folders, reader response books, and spelling journals.  On top is old leveled readers that I let the kids take home if they want.  The other side is all the extra loose leaf paper, composition books and folders.
Those labels are from the Flamingo Watercolor collection, too!

Homework binders and planners go in chair pockets, just like my last year's class. These are the large Seat Sack Plus from The Original Seat Sack Company.  They are my FAV! Super durable! 
These girls are sitting at my free kitchen table! 

There are enough chairs for every child, even though they are not required to sit in them and they sit in new seats each day.  The kids are grouped into 5 heterogeneous groups of 5 for our current social studies and science units.  I'm doing expert groups/jigsaw activities for both units, so it's super helpful to have them in the same groups.  As they come in in the morning, each group decides where they want to sit and places their team sign on the table.  The table number holders are from Amazon.  I went to two different restaurant supply stores on island and they didn't have them.  I tried to buy local! Lol.  
The signs are from, you guessed it, the Flamingo Watercolor collection!

At each table is a supply caddy for supplies they need more often: pencils, erasers, glue, scissors, and crayons.  Some of the caddies are from Really Good Stuff and some are from School Girl Style.  Melanie has some awesome colors in her shop! 

So far, I'm really happy with this set up! And the kids and I can easily move tables and chairs to the side to have more space in the classroom for dance or drama.  And I'm happy to not have extra things from home all over the classroom, just the necessities! 

What are your favorite storage tips?